This Apocalyptic 6000 point game was fort on the J’migan Bridge board at Warhammer World.
The Grey Knights won the role for first turn and deployment. The Grey Kights are supported by a Baneblade and Knight Errant from House Eclipse. The Ultramarines are supported by a Warhound Titan from Lego Astraman.
Deployment

Deployment on J’migan Bridge

Grey Knight right flank deployment on J’migan Bridge
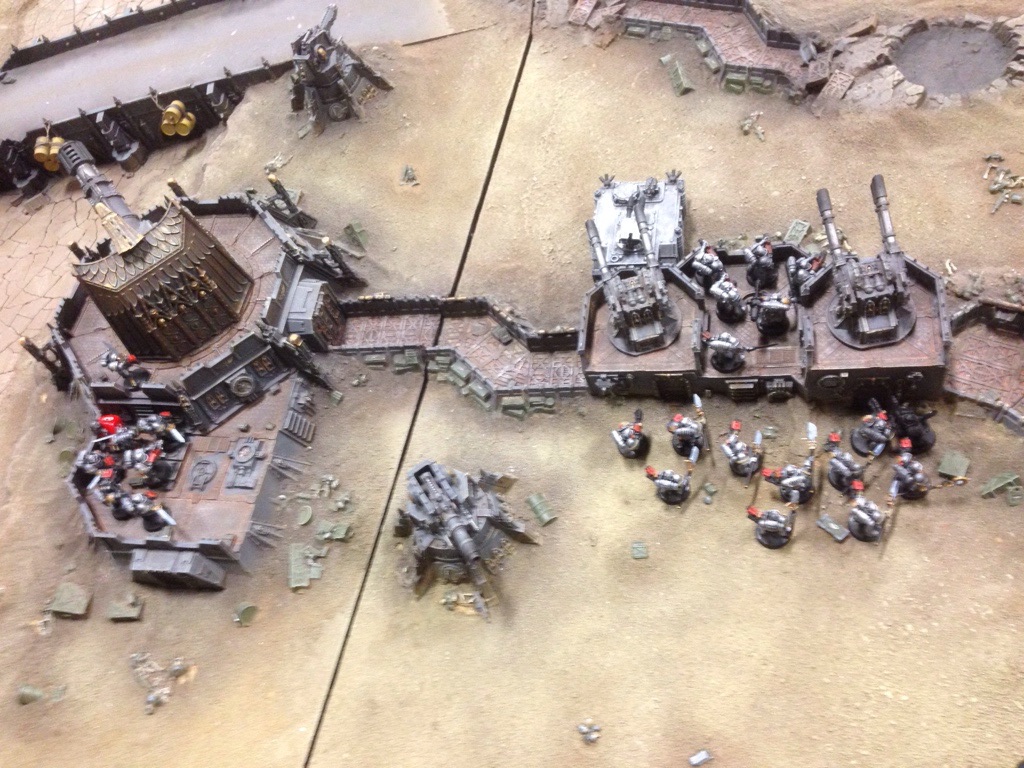
Grey Knigh right flank

Grey Knight left flank deployment on J’migan Bridge. Two Assassins, Baneblade, Dreadnought and two Tech Marines

Another view of the Grey Knight left flank deployment on J’migan Bridge

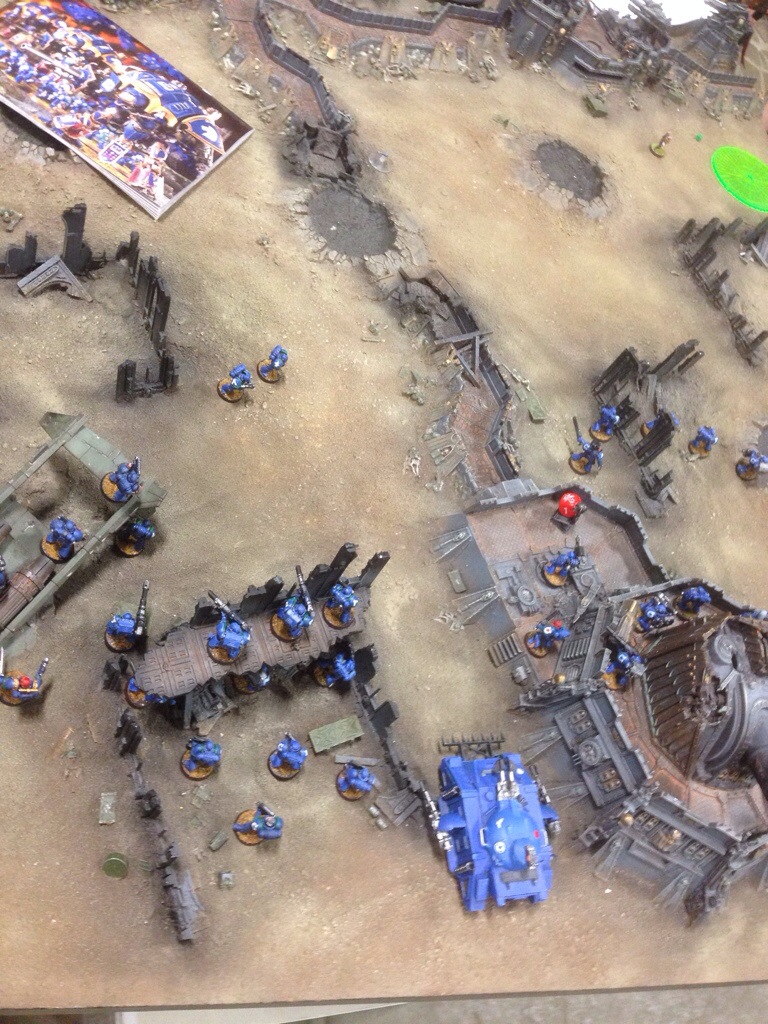
Ultramarines deploy five Devastator squads and four dreadnoughts on the right flank

Ultramarine right flank deployment on J’migan Bridge

Ultramarines deploy 5 Devastator squads on the left flank.

Another view of the Ultramarine’s left flank.
Grey Knight Turn One
The Grey Knights began their turn by opening up the big guns

The Baneblade fires

The ground shakes and Eight Ultramarines are killed by the Bane Blade
 The Grey Kinghts Stand firm against the Ultramarine heavy weapons. The Fortification saving them from many casualties.

The Techmarine picks the next target for his orbital bombardment

The Assassin advances towards his target

First Blood, an Ultramarine Dreadnought

Second Blood, another Ultramarine Dreadnought

An Ultramarine Devastator Squad takes heavy casualties
Ultramarine Turn One
Ultramarine tanks and Fido Dominas the Warhound Titan, re-enforce the the dwindling devastator company. Determined to reduce the fire-power the Grey Knights have to use. The Ultramarines focus on taking as high a death toll as possible and forget to claim an objective near their deployment zone.

The Ultramarine’s re-enforce their left flank with a Land Raider a Storm Eagle and a Warhound,

The Storm Eagle advances towards the unclaimed objective.

An Astro Lego Warhound advances along the river bed toward J’migan bridge; searching for targets

Two hull points are removed from the BaneBlade by Ultramarine Deistators

The Techmairne is killed by the Warhound’s Turbo Laser

The fortification is no defence from the Titans D weapons. The Grey Knight squad takes heavy casualties.
Grey Knights wining 3-2
Grey Knight Turn Two
The Grey Knights re-enforcements arrive and advance towards the unclaimed objectives. The Storm Raven shoots the Storm Eagle forcing it to evade unsuccessfully. Immobilised the Storm Eagle is unable to evade the second shot from the Storm Raven and crashes to the ground in a ball of fire.

The Grey Knights advance on the unclaimed objective

An assassin emerges from the ruins and removes an Ultramarine sergeant and two devastators.

The Baneblade adds more Space Marines it’s kill count and the Fury Class Dreadnought is damaged in the blast.

The Trenches form no obstacle to the Baneblade.

The Grey Knight Tech-marines thin out the Ultramarine line.

The Grey Knights take a forth objective.
Ultramarine Turn Two
The Ultramarine Terminators and assault marines deepstrike near an objective in the Grey Knight deployment zone. A Land Raider and another Predator arrives to re-enforce the Ultramarine line. After the Warhound removes the Grey Knights near the Ultramarine deployment zone a devastator squad and Land Raider run forward onto the objective.
The Ultramarines managed to destroy the BaneBlade and Storm Raven.

A deep strike for the Grey Knight objective.


Ultramarine fire all they have at a Bane Blade, knowing their reward will be a Imperial Knight to destroy.
End of turn two Ultramarines winning 8-6
Grey Knight Turn Three
The Grey Knights pushed onto all the objectives they could. Having only removed the void shields from the War hound in the previous turn. The Grey Knights managed to destroy The Warhound with only 5 lucky shots. Four penetrated, two caused explosions and rolls a 6 and a 5 for the extra damage meant a total of 10 hull points were removed. The War Hounds reactor explosion killed a further 8 Ultramarines.

The assassin advances towards the Ultramarine held objective.

More Devastators fall to the BaneBlade. The MkIV Venerable Dreadnought has moved to cover the MkI Fury Class Dreadnought.

The Grey Knights surround the Ultramarine threatening their objective.

Grey Knight re-enforcements arrive.

The assassin shoots at the Space Marines before moving in for the kill.

The assassin runs to contends an objective

Grey Knight re-enforcements arrive in a Land Raider and Storm Eagle

The Ultramarine Assault squad losses all bar one

The Ultramarines are removed from the objective by the Storm Ravens guns.

A short combat between Grey Knights and Ultramarine Terminators.

The Ultramarines fight bravely against an assassin, but the objective is lost.
Grey Knights Winning 7-6
Ultramarine Turn Three
The Ultramarines killed the edvasor assassin on their right flank and prepared to shoot as many Grey Knights on the left flank objective as possible. As the doors of Warhammer World closed, The Ultramarines Sternguard and remains of two Devastator Squads near the Caldias assassin could be herd screaming charge .

The Ultramarines swap the Assassin to the Baneblade

Captain Ben Jackson prepares to deal with an assassin.
Final score Ultramarines Winning 9-7
The Grey Knights held 6 victory points worth of objectives. The Ultramarines held 3 victory points worth of objectives. Nine victory points worth of objectives were still available to be won or lost.
Conclusion. Call it a draw and tell Ben he needs to play faster in future.


You must be logged in to post a comment.