I’ve consolidated all the posts I’ve made on my Warhound Titan build so far below. Over 18 months from writing this post I’m still adding to the model. With hind sight I wish I had just put in some over time at work and bought a forge world kit. I don’t re great building this Titan. I’ve just added up the amount of time it took me and worked out I could have bought 2 for the amount of hours involved. Don’t let this put you off if you are thinking of building one yourself. Just consider how you want to spend 60-70 how’s. It’s a lot of painting time. I’ve added a small section about a 12k game I used the Warhound Titan in at the end of the article.
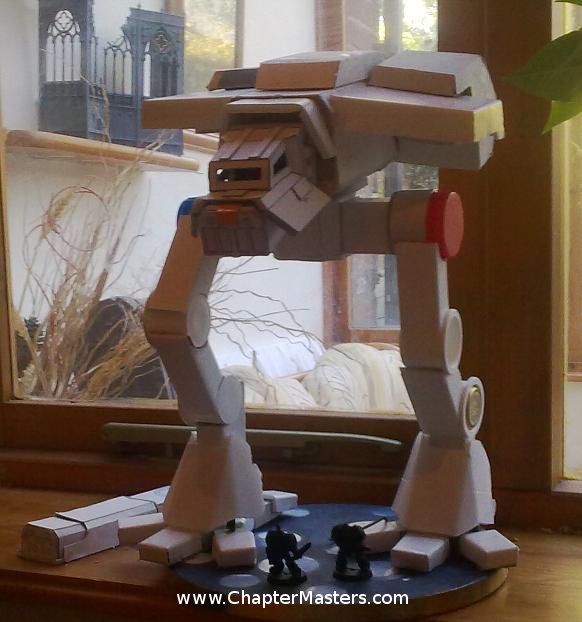
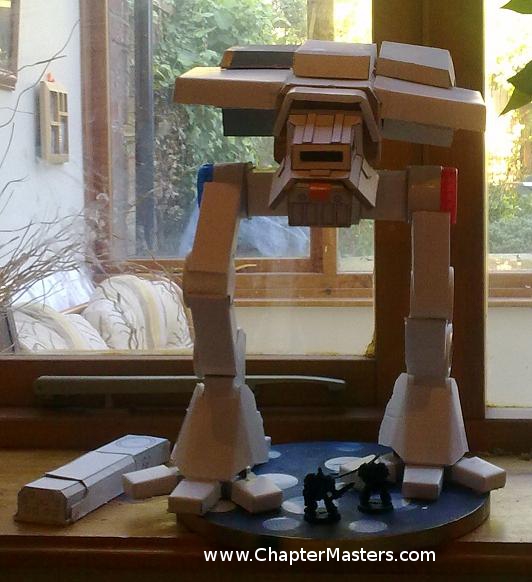
I’ve been a bit quite on Chaptermasters lately so I thought I’d share what I’ve been up to. It look’s like I stand a good chance of getting my scratch built Warhound Titan Fidodominus aka Fido finished in the next week or so. Here are some pics of the build so far. This has been made from the DIY-Warhound-Titan-Plans-Template.pdf you can find on line, if not you can email ben@chaptermasters.com for a copy. I have modified some parts of the design to make my Warhound so your’s may not look the same. I hope yours looks better.
Head and Hull
I started by building a head and Vulcan mega bolter. reasoning these would make good terain if I didn’t get the project finished. These were made from card. I realised card would not be great for hanging PVC pipes from, so I constructed the hull and shoulder pads from foam board. In retrospect a wood or plastic core would have been better.
Feet
I made the foot from a core of foam board and made the toes from card. I now regret this as the tows were a bit week to don’t hold the model to the base. I’d like to transfer the Titan to a lower bases but I ended up using so much glue to hold it down I can’t remove it with causing a lot of damage.
Leg
I’ve now made the second foot and have started on the leg. The leg looked good at this stage.
Legs
 Once I’d got the second leg made I headed down the the hardware store and bought some pumping pipe joints. I got six sections for £5. These pipes are bigger than the ones on the template but were all I could find. I recommend looking harder if you have time. I used plastic milk bottle tops and metal bottle screw caps tops on the ends of the pipes. I used hair band to hold the foam board while it was setting. Once the pipe had been added I found the foam board jointing to the card foot counldn’t take the weight. Not wanting to had to remake the toes, I reverse the joint to set the legs in a running pose. When joining the leg sections to the plastic pipes I found there wasn’t enough surface left on the foam board to make a good contact with the plastic pipes. It might have been ok if I’d made end on the leg sections but I’d left them hollow? To get around this I covered the ends of the foam board sections with card. This increase the contact with the plastic as it will rap to shape and this held the legs well. However this still isn’t strong enough and I sometimes have to re-glue the legs.
To make the legs a bit stronger I also used what should be a top leg section as the middle piece. I also didn’t like the look of the middle template and wanted to give this Warhound Titan a more dynamic pose.
Given the increased size of the pipes and change in leg sections, the Warhound Tital stands about 2″ than the Forge World model. By tilting the body I’ve got the guns and head to the same height as the Forge World model. At this stage in the build One of the sholder pads has dropped I fixed it later on.
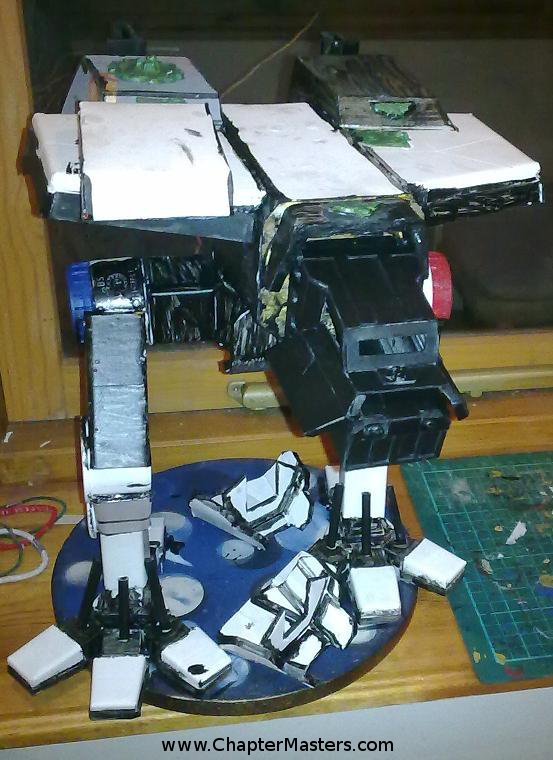
It’s been a good day on the Warhound Titan. I’ve made two new weapons, the Vulcan mega bolter and plasma blast gun were going to need a bit more time and care than my deadline will allow so I’ve made a couple of turbo laser destructor from £5 worth of pipe and what is left from the foam board. I’ve constructed two exhaust from a peace of plastic cover and some card board. I’ve also used some green stuff to add some details. The green haven’t come out very well. I’m hoping I can tidy them up a bit once they have dried.

I’ve trimmed around the greens, which has sharped them up a bit. I’ve also started to PVA coat all the card board to add some strength. I’ve mixed in black paint with the PVA, partly so I know where I’ve painted and partly to reduce the number of coats of primer it will need.
I’m hoping to start painting it green tomorrow.
Ben
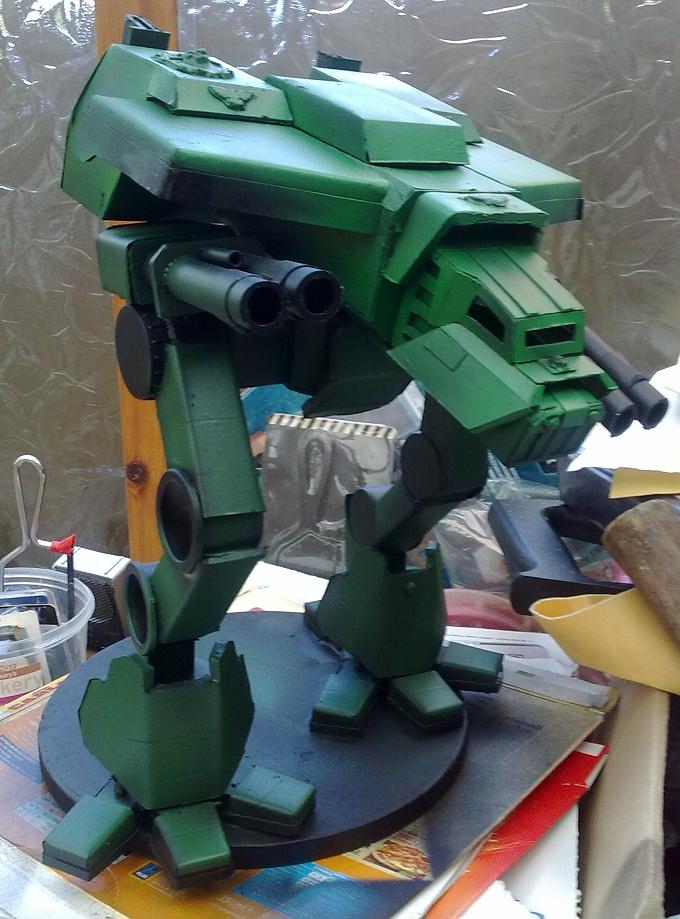
I’ve fanaily got to put paint on my Warhound Titan today. I started by spraying a mix of two old Games Workshop green paints, Emeralde and Dark Angel.
I uses a second mix of mid green and light green, to add high lighting with the spray gun. The guns are just resting on the legs in this photo.
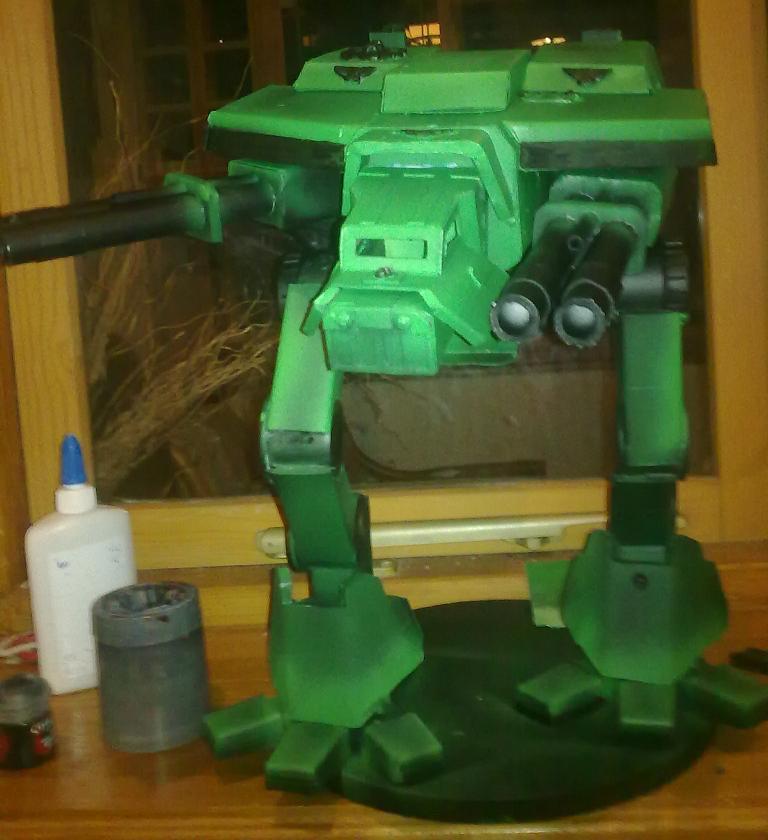
I’ve now gone back over the black parts and started to paint some of the details and glued the guns in place.

I’ve gone over the over spray now and started painting the detail. Skulls, Eagles, leg joints and gaps on the armour plates.
I’m playing a game today so will be trying this out as it is before added a bit more paint and details.
Ben
 I’m happy to report Fido Dominus did very well in the battle, killing a Demon prince, vaporising 3 Demolishes and stunning a couple of Defilers. What no damage to the Warlord I here you say. No the stearnguard wit combi meltas, dregnought with multi melta and devastator marines dealt with that making it go super nova in turn 2. This was a bit of a shock to us. We got carried away shooting and lost track of how many structure points were left. The explosion killed about 50 Marines, 10 Guards men, a Drop Pod and Razor Back in the process. Fido did get shot by a squad of 5 Chaos Terminators with at least some Metla guns, none of which managed to penetrate as they were over 6 inches away.
I’m having a good think about what marking and details I’m going to paint on him now.
You must be logged in to post a comment.