
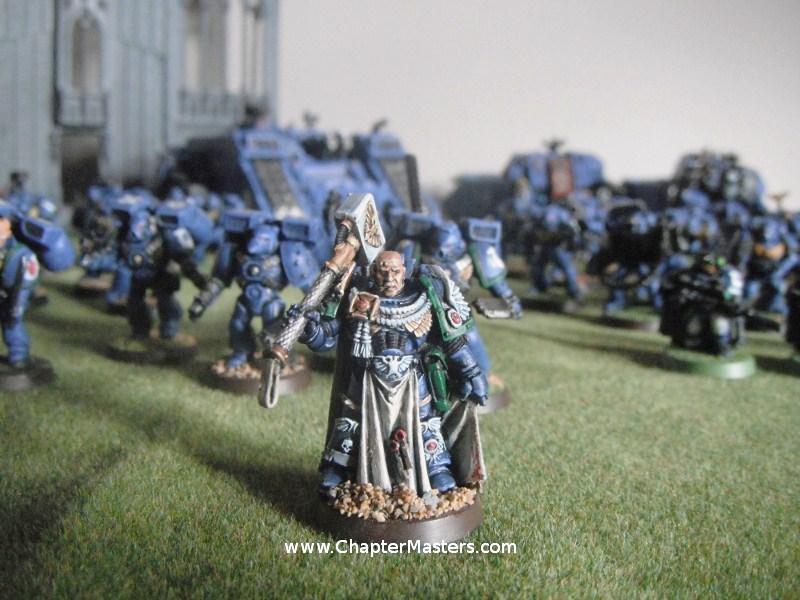
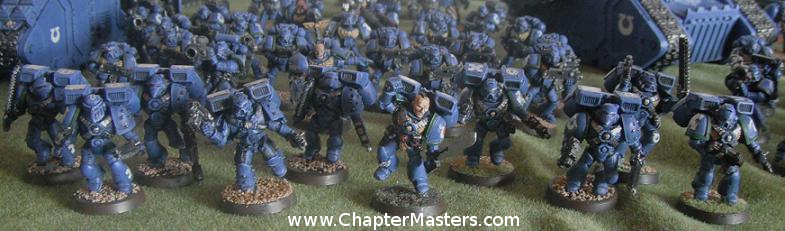
With many people aiming to complete large numbers of troops for Apocalypse finding tips for Speed painting are all the more important. I’ve just revisited an article I wrote for the ChapterMasters Blog in August last year. I’m pleased to say the models I mentioned below have now been added to my 4th company and I’m now working on a command squad.
Despite my best attempts to exercise self control I’ve been unable to resist some bargains on ebay and the number of unpainted models in my collection has exploded. Those that follow my blog will probably know I spend about as much time painting Ultramarines as I do all my other six or so armies put together. I find blue to be the best colour to get a good consistent result with, so provides the most satisfaction. Due to snapping up another black reach set -Dreadnought and a hand full of Orks for £12. I’ve almost got enough models to finish of my mostly late Mk7 power armour forth company (at the moment I bulk it our with old Mk6 models with non company markings. I’ve also gained a few more models towards my mostly Mk6 Second Company and early Mk7 3rd company.

There are two ways I can tackle the 30 powered armoured marines on the list. One is The hard way.
One model at a time
- Spray black
- Paint A dark blue base (mordian, Necron abiss or Kantor blue)
- Paint an mid blue on the raised area’s (Ultramirine or Calgar blue)
- Paint a mix of mid blue and light blue on the armour edges (Mid blue from above with Space Wolf or Ulthuan Grey)
- Paint a fine highlight of light blue/grey on the armour edges (same colours as above with more grey or white in the mix)
- Use a blue wash over the armour.
- Paint all the other details following similar stages
Then there are a number of easier ways which involve cheating on some of the steps I’m clearly going to take the easy route. The question is which steps can be short cut or skipped with the least impact on the model? I’m going to look at them step by step.
Use a white undercoat skip the dark blue base and wash.
- Use a whiteundercoat
- Paint an mid blue on the raised area’s (Ultramirine or Calgar blue)
- Paint a mix of mid blue and light blue on the armour edges (Mid blue from above with Space Wolf or Ulthuan Grey)
- Paint a fine highlight of light blue/grey on the armour edges (same colours as above with more grey or white in the mix).
- Paint all the other details following similar stages
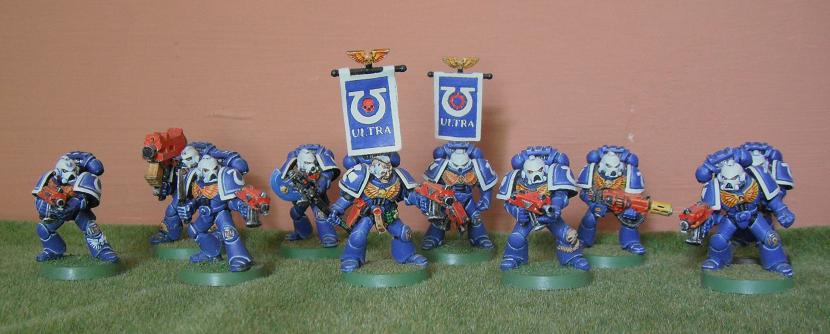
These Veterans where all undecorated white and then painted with Ultramarine blue (you can skip undercoats, but only on plastic models. I’ve found that if you can skip the dark base coat if you apply an even lighter two stage highlight that you normally would. The models above have a two stage highlight with Space Wolf Grey as the sencond stage. I’m quite happy with the result but the overall lightness of the models just isn’t grim or dark enough for me.
Use a Spray Gun
Rather than skiping the dark blue stage altogether you can use a spray gun or an air brush to apply the dark blue base. The Mk5 marine in the assault squad below was painted with a spray gun and is indistinguishable from the models around it painted with a brush.
- Spray black
- Spray dark blue base (mordian, Necron abiss or Kantor blue)
- Spray from above only mid blue on the raised area’s (Ultramirine or Calgar blue)
- Paint a mix of mid blue and light blue on the armour edges (Mid blue from above with Space Wolf or Ulthuan Grey)
- Paint a fine highlight of light blue/grey on the armour edges (same colours as above with more grey or white in the mix)
- Use a blue wash over the armour.
- Paint all the other details following similar stages
Overbrush
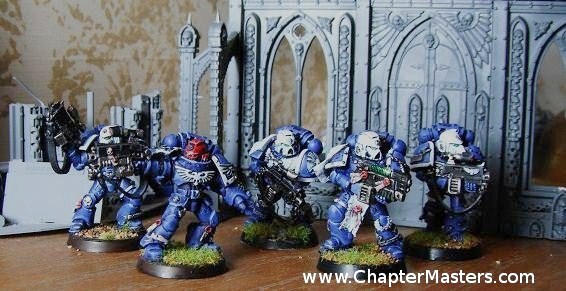
If you don’t have a spray gun, or the money to buy paint and compressed air at the rate it uses it. You can over brush the mid blue over the dark blue. Over brushing is similar to dry bushing, but you want enough paint to cover most of the armour plate with out going in to the armour recesses. You also don’t want to worry about getting into areas of natural shade, under leg plates, under the groan, between the legs, excreta. The Sterngurd below where over brushed with Ultramarine blue
- Undercoat black
- Base with a dark blue base (mordian, Necron abiss or Kantor blue)
- Over brush with mid blue on the raised area’s (Ultramirine or Calgar blue)
- Paint a mix of mid blue and light blue on the armour edges (Mid blue from above with Space Wolf or Ulthuan Grey)
- Paint a fine highlight of light blue/grey on the armour edges (same colours as above with more grey or white in the mix)
- Use a blue wash over the armour.
- Paint all the other details following similar stages
Skip the mid blue
Skip the mid blue on the armour plates. I can’t show you a picture of a model where I have done this and not because I haven’t, but because the model ends up looking so dark it looks more like a crimson fist than an Ultramarine and i’ve always ended up going back an repainting the model
Skip the mid highlight
- Spray black
- Paint A dark blue base (mordian, Necron abiss or Kantor blue)
- Paint an mid blue on the raised area’s (Ultramirine or Calgar blue)
- Paint a fine highlight of light blue/grey on the armour edges (same colours as above with more grey or white in the mix)
- Use a blue wash over the armour.
- Paint all the other details following similar stages
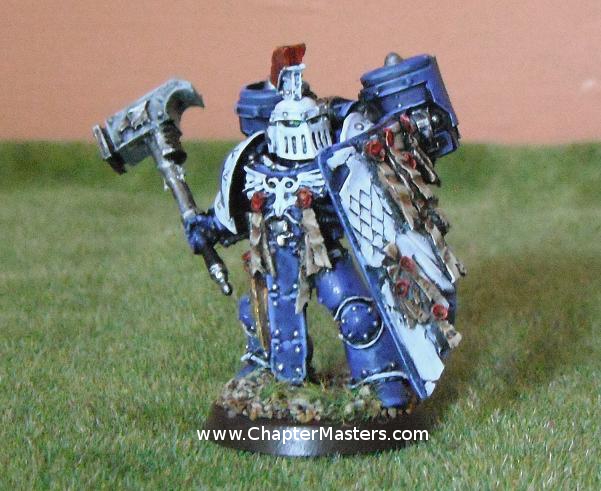
The veteran above has a single stage of highlight on the blue armour. I’ve been surprised at how little difference this makes. This model doesn’t have many hard edges on the armour plates but the effect has worked just as well on other models. I find the wash becomes all the more important if you skip your mid highlight. You can can make up for it buy applying more highlighting to the details on the model. This is a good trick for shifting the focal point on the model. I generally tend to apply one extra stage of highlight to the helmet to keep this as the focal point.
Skip the fine highlight
- Spray black
- Paint A dark blue base (mordian, Necron abiss or Kantor blue)
- Paint an mid blue on the raised area’s (Ultramirine or Calgar blue)
- Paint a mix of mid blue and light blue on the armour edges (Mid blue from above with Space Wolf or Ulthuan Grey)
- Use a blue wash over the armour.
- Paint all the other details following similar stages
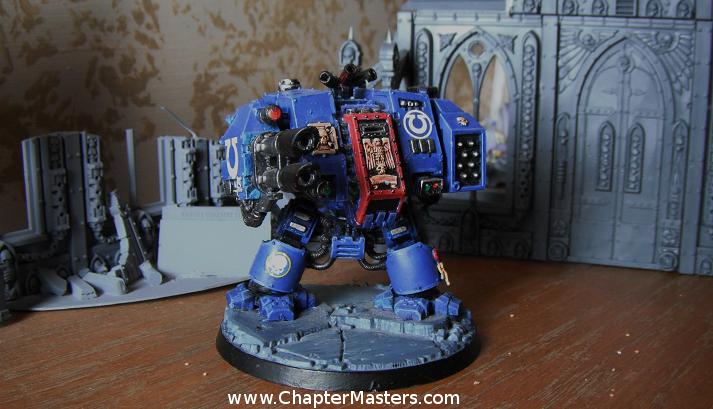
The dregnought has only had a single highlight with a two part Ultramarine one part Space wolf Grey mix. This result I’m not happy with. The model doesn’t look finished and a bit flat.
Skip the wash
- Spray black
- Paint A dark blue base (mordian, Necron abiss or Kantor blue)
- Paint an mid blue on the raised area’s (Ultramirine or Calgar blue)
- Paint a mix of mid blue and light blue on the armour edges (Mid blue from above with Space Wolf or Ulthuan Grey)
- Paint a fine highlight of light blue/grey on the armour edges (same colours as above with more grey or white in the mix)
- Paint all the other details following similar stages
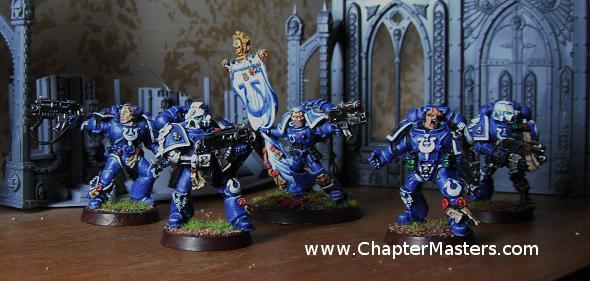
These veterans have not been washed with blue. I find if all the other stages are followed you can get away without the wash. In fact I now regard the wash as an alternative to the mid highlight. You do have to consider the rest of you army though. You can wash you old models to bring them in line but you can’t of course de-wash your old models.
Well there you go. Which result do you like best which stage do you think makes the lest difference to the finished result.
Ben